Today we are going to take a look at how to connect your Android Device wirelessly to your Mac and debug your Applications wirelessly with the all new Visual Studio for Mac!
So first of all there are some preqesuits which need to be fulfilled before we can move along.
- Your mobile device and your PC need to be on the same Wireless Network.
- You need to setup your mobile device and your PC for debugging. ( more info on how to do that here : https://developer.android.com/studio/run/device.html )
Now we are all ready and set up, lets move along.
Connect your Android device to your Mac via USB, and then open up Visual Studio.
Here, navigate to Tools->SDK Command Prompt
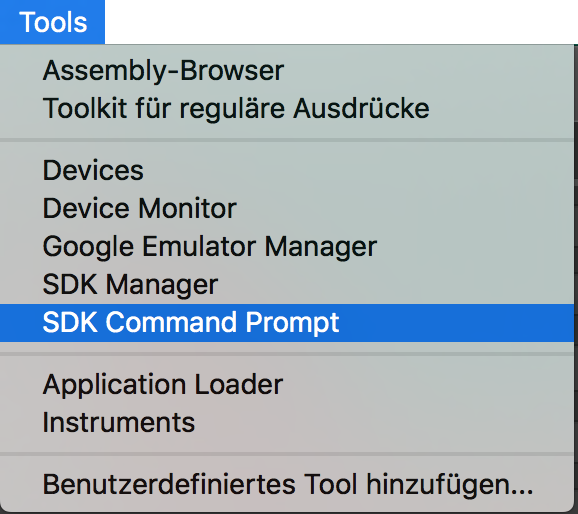
This will open up a Terminal window. Here, type the following command to list all attached devices :
adb devices -l
This will print a list of attached devices and simulators, similar to the following output:
List of devices attached
1163748890             device usb:337641472X product:bbb100emea model:BBB100_2 device:bbb100
emulator-5554          device product:sdk_google_phone_x86 model:Android_SDK_built_for_x86 device:generic_x86
So now you need to find out which device is yours, in my case the only usb device is the deployment target. Next, type this command in the terminal, where you replace the number behind -s with the one shown in your terminal above :
adb -s 1163748890 tcpip 5555
In case you got multiple devices attached, it is necessery to tell adb which one your command is targeting. This command restarts the connection in TCP Mode on port 5555.
Next, find out your devices ip:
adb -s 1163748890 shell ifconfig wlan0
Again, substitute the number with your devices id. The terminal will then output something along these lines :
wlan0     Link encap:UNSPEC
          inet addr:192.168.1.206  Bcast:192.168.1.255  Mask:255.255.255.0
          inet6 addr: fe80::cefd:17ff:fee7:26e1/64 Scope: Link
          UP BROADCAST RUNNING MULTICAST  MTU:1500  Metric:1
          RX packets:34134 errors:0 dropped:42 overruns:0 frame:0
          TX packets:23538 errors:0 dropped:0 overruns:0 carrier:0
          collisions:0 txqueuelen:1000
          RX bytes:28556879 TX bytes:2644409
Where you can see the ip on the second line, in my case 192.168.1.206 And now the final step is to connect to the device via its ip, like this :
adb connect 192.168.1.206
Unplug the USB Cable, and verify if the connection was successfull by listing the devices again
adb devices -l
This should show a new device with the ip of your phone.
Now you are all ready and set up, go back to Visual Studio and there is a new deployment target showing up!
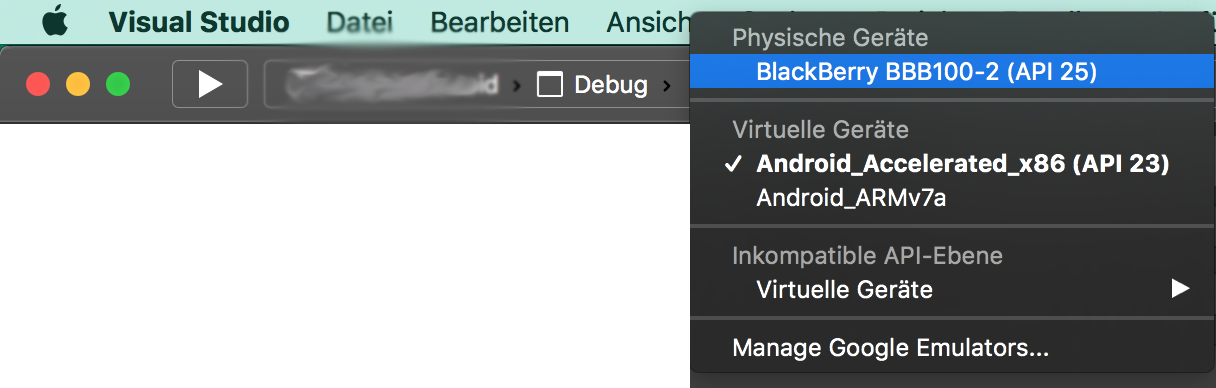
Hit play and your app will be debugged on your device!
